 ultimate-guide
Industrial Blade Maintenance Checklist 2026
Table of Contents
- Industrial Blade Maintenance Checklist 2026: What to Inspect Daily
- Industrial Blade Inspection Checklist: Measurement Thresholds That Matter
- Safe Blade Removal and Reinstallation with Lockout/Tagout
- Industrial Blade Sharpening: When to Sharpen vs. Regrind
- Industrial Blade Replacement Signs You Should Not Ignore
- Granulator Blade Maintenance and Energy Use: The Hidden Cost of Dull Blades
- Blade Alignment, Machine Setup, and Lubrication Checks
- Maintenance Records, Traceability, and Audit-Ready Documentation
- Frequently Asked Questions
Last Updated: October 5, 2026
Industrial Blade Maintenance Checklist 2026: What to Inspect Daily
An industrial blade maintenance checklist 2026 is a documented set of daily, weekly, and monthly tasks that keeps cutting edges sharp, machines aligned, and production predictable.
Daily tasks take minutes and catch failures that turn into a full shift of downtime. But "daily" differs by blade: a guillotine knife running one shift needs a different routine than a granulator rotor running three shifts through abrasive regrind.
Daily Tasks by Blade Type
Use the row matching your machine's blade. Each task lists the owner and pass/fail signal so the check is not left to judgment.
| Blade Type | Daily Task | Owner | Pass/Fail Signal |
|---|---|---|---|
| Guillotine / shear knife | Wipe edge, feel for nicks, check bed knife clearance with feeler gauge | Operator | No nicks; clearance within machine spec |
| Three-knife trimmer | Check all three edges, verify clamp pressure, listen for change in cut tone | Operator | Clean cut on scrap; no change in tone |
| Granulator / shredder | Check rotor and bed knife for chips, verify screen integrity, log motor amps | Operator | Amps within baseline band; no missing teeth |
| Press brake punch/die | Inspect punch tip and die shoulder for galling, check tonnage reading | Operator | No galling; tonnage matches setup sheet |
| Planer / chipper knife | Check knife projection and gib torque marks, feel for nicks | Operator | Projection within spec; torque marks aligned |
| Circular saw blade | Check tooth count, look for chipped or missing teeth, verify arbor runout by feel | Operator | No missing teeth; no wobble at speed |
- Power down and apply lockout/tagout before touching any blade.
- Wipe cutting edges with a clean cloth; remove residue buildup and debris.
- Run a gloved finger along the edge to feel nicks, rolled edges, or micro-damage.
- Check tooth condition on toothed blades for chips or missing teeth.
- Listen for vibration or operating noise changes during the first production run.
- Log the inspection with time, initials, and any noted defect.
A common mistake is inspecting blades only when cut quality drops. By then, blade wear has already transferred to the machine.
Daily Sign-Off Block
Print this block on the daily checklist so each task has an owner and timestamp, not just a checkmark.
- Blade ID: __________ Machine: __________ Shift: __________
- Daily inspection completed by: __________ Time: __________
- Defect noted (Y/N): __________ Description: ____________________
Weekly and Monthly Add-Ons
Daily checks catch acute damage. Weekly and monthly tasks catch drift.
- Weekly: measure thickness at three points, check runout with a dial indicator, verify fastener torque, inspect mounting surfaces.
- Monthly: review sharpening history against hours run, audit records for missing sign-offs, re-baseline motor amps for granulators and shredders, inspect stored blades for corrosion.
When the daily sheet shows the same defect three shifts running, escalate to the weekly measurement, that pattern is the earliest reliable signal a blade is moving out of spec.
Industrial Blade Inspection Checklist: Measurement Thresholds That Matter
An industrial blade inspection checklist works only if it defines pass/fail numbers. "Looks fine" is not a threshold. Set measurable limits before the blade goes back into service.
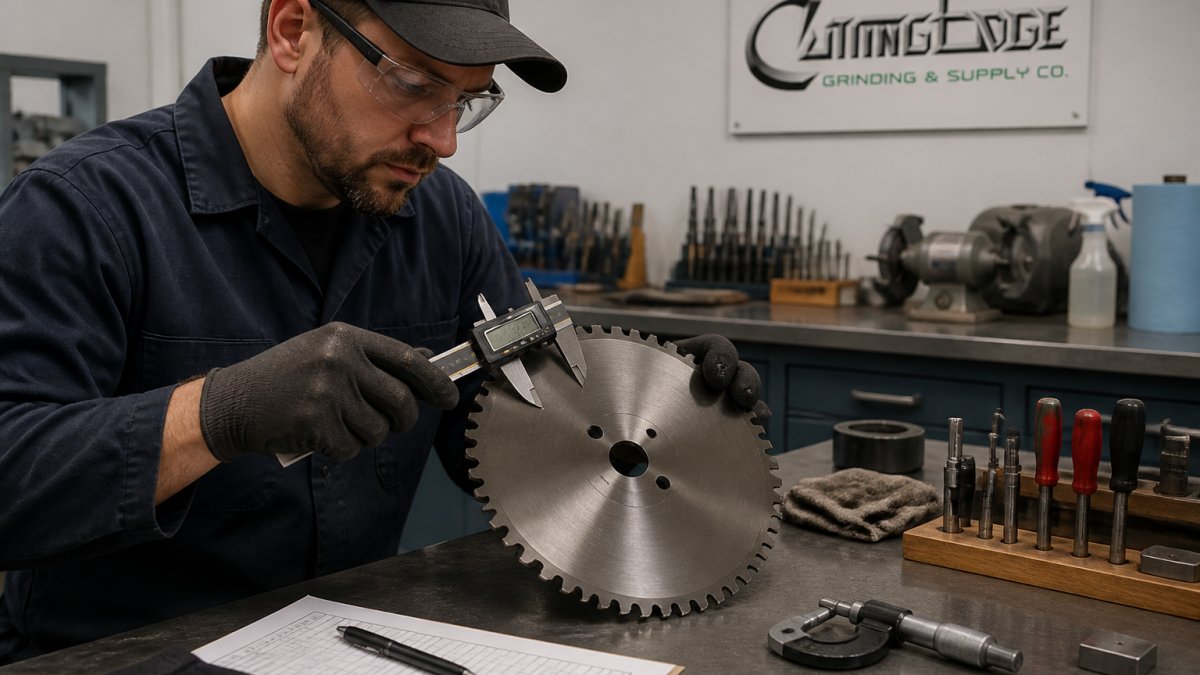
Visual Inspection for Wear, Damage, and Micro-Cracks
Under good light, look for these defects:
- Micro-cracks along the cutting edge, often visible as fine dark lines
- Chipped or rounded cutting edges
- Discoloration from heat, which signals the edge has lost temper
Any crack, heat discoloration, or chip larger than the manufacturer's allowance means the blade comes out of service immediately.
Thickness, Runout, and Sharpness Testing
Measure thickness at three points along the edge against the manufacturer's minimum. Measure runout with a dial indicator while the blade rotates slowly; excess runout causes vibration, poor cut quality, and premature wear. For sharpness, test-cut scrap and compare force and edge finish against a known-good blade.
| Check | Tool | Typical Action Threshold | Frequency |
|---|---|---|---|
| Edge cracks | Visual, magnification | Any visible crack | Daily |
| Thickness | Micrometer | At or below manufacturer minimum | Weekly |
| Runout | Dial indicator | Exceeds machine spec | Weekly |
| Sharpness | Test cut on scrap | Force rises noticeably | Daily |
| Tooth condition | Visual | Chipped or missing teeth | Daily |
Safe Blade Removal and Reinstallation with Lockout/Tagout
Blade changes cause the most serious injuries in cutting operations, and lockout/tagout prevents them. Follow this sequence every time, with no shortcuts.
- Notify affected operators and shut down the machine at the disconnect.
- Apply the lock and tag; verify zero energy by attempting a start.
- Confirm the blade has stopped and cooled before handling.
- Wear cut-resistant gloves, safety glasses, and a face shield; use a blade carrier or handling jig.
- Loosen fasteners in a cross pattern; support the blade before removing the last bolt.
- Inspect the mounting surface, hub, and fasteners for damage while the blade is out.
- Install the new or resharpened blade, torque fasteners to the machine spec in a cross pattern.
- Remove locks and tags only after guards are reinstalled and the area is clear.
Industrial Blade Sharpening: When to Sharpen vs. Regrind
Sharpen when the edge is dull but the blade body is intact. Regrind when material must be removed to restore geometry, correct damage, or bring thickness back into spec. Industrial blade sharpening removes a little material to restore the edge; regrinding removes more to correct the blade's profile.
Sharpening and Regrinding Procedures
A controlled procedure protects temper and geometry.
- Clean the blade and inspect for cracks before any grinding.
- Set the grinding angle to the manufacturer's specification for that blade type.
- Cool continuously during grinding to prevent heat damage.
- Remove the minimum material needed to restore the edge.
- Deburr and hone the finished edge.
- Measure thickness, runout, and edge angle before returning the blade to service.
In-house sharpening often fails because the angle drifts and heat builds up. Precision regrinding holds both within spec, so blades last longer between services.
Industrial Blade Replacement Signs You Should Not Ignore
Replace the blade, not just resharpen it, when the body is compromised. Industrial blade replacement signs include cracks of any size, heat discoloration, thickness below the manufacturer's minimum, uncorrectable runout, and repeated sharpening that no longer holds an edge.
Failure Diagnosis: Linking Symptoms to Causes
Match the symptom to the likely cause and corrective action.
| Symptom | Likely Cause | Corrective Action |
|---|---|---|
| Ragged cuts | Dull edge | Sharpen or replace |
| Vibration | Excess runout, loose fasteners | Check alignment, retorque |
| Rising energy draw | Dull or worn blade | Sharpen; measure thickness |
| Chipped teeth | Impact, misalignment | Inspect feed, realign |
| Short blade life | Wrong angle, heat damage | Verify grind spec |
Granulator Blade Maintenance and Energy Use: The Hidden Cost of Dull Blades
Granulator blade maintenance and energy use are directly linked: a dull blade forces the motor to work harder for the same throughput. Rising energy draw is often the first measurable signal of blade wear, well before cut quality drops. A dull edge increases cutting force per stroke, the motor draws more current to maintain speed, and that current shows up as heat, drive-train wear, and higher kWh per pound.
Building a Motor-Amp Baseline
You cannot act on a signal you have not measured. Establish a baseline on a known-good blade before using energy draw as a wear indicator.
- Install a fresh or freshly sharpened blade and confirm all setup specs are met.
- Run the machine on the normal material at the normal feed rate for at least one full shift.
- Record motor amps at steady state, not during startup inrush, at 15-minute intervals.
- Average the readings to get a baseline band. A common practice is to treat a sustained rise of roughly 10 percent above baseline as the trigger to inspect the blade.
- Re-baseline after every blade change, material change, or screen change, because each of those shifts the load.
Duty Cycle and Material Change the Frequency
A granulator running clean, dry regrind one shift a day wears very differently from one running filled or glass-filled resin three shifts a day, as do shredders processing mixed post-industrial scrap versus sorted film. Use the table below as a starting framework and adjust with your own amp data.
| Application | Typical Duty Cycle | Inspection Frequency | Sharpening Interval Guidance |
|---|---|---|---|
| Clean regrind, unfilled resin | 1 shift | Daily visual, weekly amps | When amps rise ~10% above baseline |
| Filled or glass-filled resin | 2-3 shifts | Every shift visual, daily amps | Shorten interval; expect faster edge rounding |
| Mixed post-industrial scrap | 2-3 shifts | Every shift visual, daily amps | Inspect for chips after any impact event |
| Film and thin sheet | 1-2 shifts | Daily visual, weekly amps | Watch for wrap and heat buildup, not just dullness |
| Heavy shredder, mixed feed | 2-3 shifts | Every shift visual, daily amps | Replace at first sign of body cracking |
From Signal to Action
When amps climb above the baseline band without a change in material, feed rate, or screen: inspect the edge, measure thickness and runout, then decide sharpen versus replace. Dull edge with an intact body, sharpen.
Track motor amps or energy draw per shift alongside blade condition. When draw climbs without a change in material or throughput, inspect and sharpen. This turns blade maintenance into a measurable cost control rather than a scheduled guess.
Blade Alignment, Machine Setup, and Lubrication Checks
Alignment and lubrication protect the edge between sharpenings. Machine alignment covers blade alignment, gib and bed knife clearance, and fastener torque. Check runout after every blade change and recheck after the first production run, since fasteners settle.
Lubrication and corrosion prevention matter most in humid or washdown environments. Apply the manufacturer's recommended lubricant to moving contact points and coat stored blades with a rust preventative.
Maintenance Records, Traceability, and Audit-Ready Documentation
Records turn maintenance into evidence. Capture blade ID, install date, hours run, material cut, inspection results, sharpening history, and the name of the person who performed each task.
Use this sign-off block on every checklist:
- Blade ID: __________ Install date: __________ Hours run: __________
- Daily inspection completed by: __________ Time: __________
- Weekly measurement (thickness / runout): __________ Pass / Fail
When downtime hits and a customer asks why, the record answers, and shows which blades fail early and whether the cause is the blade, the machine, or the operator.
Blade maintenance fails when it lives in someone's memory instead of a documented schedule.
Frequently Asked Questions
What should an industrial blade maintenance checklist include?
A complete industrial blade maintenance checklist covers daily cleaning and visual inspection, sharpness testing, thickness and runout measurements, alignment checks, lubrication, and safe handling procedures. It should also include sign-off fields for the operator, task owner, and date. For 2026, add objective thresholds so anyone on the floor can decide whether a blade passes, needs sharpening, or must be replaced. A printable, blade-type-specific version works best because guillotine knives, granulator blades, and shear blades have different wear patterns and tolerances.
How often should industrial blades be inspected and sharpened?
Inspect blades daily before each shift and after any unusual noise or vibration. Perform a deeper inspection weekly, and schedule a monthly review of wear trends and maintenance records. Sharpening frequency depends on material, duty cycle, and blade type. A guillotine knife cutting paper may run for weeks between sharpenings, while granulator blades processing filled plastics can dull in days. Track cutting performance and energy draw to set a sharpening interval based on your actual production data rather than a fixed calendar.
How can you tell when an industrial blade needs sharpening or replacement?
Signs a blade needs sharpening include increased cutting force, rough or burred cut edges, rising motor amperage, and visible edge rounding under magnification. Industrial blade replacement signs go further: chips or cracks at the cutting edge, thickness below the manufacturer's minimum, runout beyond tolerance, or repeated sharpening that no longer restores cut quality. If a blade has been reground multiple times and still produces unacceptable cuts, replacement is the better investment than another sharpening cycle.
Can a dull blade increase granulator energy use?
Yes. A dull granulator blade forces the motor to work harder because it must tear rather than slice material. That extra force shows up as higher amperage draw, more vibration, and greater heat buildup. Over a full production week, the energy cost adds up alongside the downtime for unplanned blade changes. Tracking energy use per ton processed is one of the clearest ways to justify a preventive maintenance schedule and to prove when granulator blade maintenance and energy use are directly linked.
What safety steps should operators follow when changing or maintaining blades?
Always follow lockout/tagout procedures before touching any blade. Isolate the machine's energy sources, verify zero energy state, and apply your own lock and tag. Wear cut-resistant gloves, safety glasses, and appropriate footwear. Use blade-handling tools or carriers rather than bare hands. Store blades in dedicated racks or boxes with edge protection. Only trained operators should remove or reinstall blades, and every change should be logged with the date, blade ID, and person who performed the work.
How should industrial blades be cleaned and stored?
Clean blades after every use to remove debris, residue buildup, and moisture. Use a soft brush or wipe with a manufacturer-approved solvent, then dry thoroughly. Apply a light coat of corrosion-preventive oil before storage. Store blades flat or in vertical racks with edge guards, away from moisture and foot traffic. Label each blade with its ID, last sharpening date, and measured thickness so the next operator knows exactly what they are installing.