 ultimate-guide
Common Causes of Machine Knife Wear: 2026 Guide
Table of Contents
- Introduction: Why Machine Knives Wear Out Faster Than They Should
- Abrasive Materials and Fillers That Accelerate Machine Knife Wear
- Improper Cutting Pressure and Speed: The Hidden Wear Multiplier
- Blade Material Selection and Heat Treatment: Getting the Basics Right
- Poor Alignment and Machine Calibration: When Geometry Goes Wrong
- Signs of Dull Industrial Knives: What to Look For Before Damage Sets In
- Does a Dull Blade Increase Granulator Energy Consumption?
- Industrial Blade Maintenance Best Practices to Extend Tool Life
- Troubleshooting Checklist for Machine Knife Wear
- Frequently Asked Questions
Last Updated: September 28, 2026
Introduction: Why Machine Knives Wear Out Faster Than They Should
Machine knife wear is the progressive loss of cutting edge material caused by abrasion, heat, impact, and chemical exposure. Most blades fail long before their metallurgy says they should, and that gap almost always traces back to correctable conditions on the floor.
Abrasive Materials and Fillers That Accelerate Machine Knife Wear
Abrasive wear is the leading cause of machine knife wear in most industrial cutting operations, and the one operators most often underestimate. When blade material meets a harder particle, the edge loses material at a rate set by that particle's hardness and shape.
Improper Cutting Pressure and Speed: The Hidden Wear Multiplier
Excessive cutting pressure and speed multiply every other wear mechanism. Too much pressure generates friction heat that softens the edge, so it abrades faster and chips more easily. Too little is just as damaging: the blade rubs instead of shearing, producing adhesive wear and burr formation.
Blade Material Selection and Heat Treatment: Getting the Basics Right
Incorrect blade material selection accounts for a large share of premature machine knife wear, especially in mixed-material shops. The fix is to map the material being cut to the wear mode it produces, then select the blade grade and heat treatment that resist that mode.
Match the wear mode to the blade grade
Abrasion, adhesion, and chipping each respond to different metallurgy. Treating them as one problem is why blade changes so often disappoint.
| Material being cut | Dominant wear mode | Blade grade that resists it | Why it works |
|---|---|---|---|
| Clean paper, soft plastics, wood | Mild abrasion | D2 tool steel | High chromium carbides give good general-purpose abrasion resistance at moderate cost |
| Filled or glass-fiber-reinforced polymer | Severe abrasion | Carbide (tungsten carbide) | Carbide hardness sits above the mineral fillers that grind away tool steel edges |
| Recycled fiber, post-consumer stock | Abrasion plus impact | M2 high-speed steel or carbide with a tough substrate | HSS holds hardness at the higher temperatures recycled stock generates |
| Thin-gauge metal shearing | Adhesion and micro-chipping | M2 or powder-metallurgy high-speed steel | Red hardness and finer carbide distribution resist edge rounding under shear load |
| Composites, abrasive laminates | Abrasion plus heat | Coated carbide | Coating lowers friction and shields the substrate from abrasive contact |
Heat treatment decides whether the alloy performs
Heat treatment quality decides whether the alloy reaches its potential. A blade hardened inconsistently, or drawn back too far during grinding, loses hardness at the edge and dulls quickly. Two blades of identical chemistry can behave completely differently if one was tempered to survive impact and the other left brittle. Higher hardness resists abrasion longer but chips more readily under shock; lower hardness survives impact but rounds over faster on abrasive stock.
Cost-benefit of blade coatings
Coatings are the most under-discussed lever in blade life. A coating does not make the substrate harder, it changes what happens at the surface where the cut occurs.
- PVD coatings (titanium nitride, titanium aluminum nitride, chromium nitride): a thin hard layer that lowers friction and resists abrasive contact. TiN is general-purpose; TiAlN holds up better as cutting temperatures climb; CrN resists material pickup in adhesive wear.
- When a coating pays off: abrasive wear modes, high-friction cuts, and materials that gall or weld to the edge. The coating slows both abrasive loss and adhesive buildup.
- When a coating does not pay off: impact-dominated cuts where chipping is the failure mode. Coating a chipping blade just adds cost to a blade failing for a different reason.
Coating a blade that was not properly prepared, or recoating a blade that has already been reground past its original geometry, rarely delivers the expected life. Coating is a finishing step, not a repair.
A note on regrind and geometry
Every sharpening removes stock and changes edge geometry, so a blade reground many times may no longer match the angle the coating or heat treatment was designed around. When edge retention drops sharply after several regrinds, the issue is often geometry rather than steel, raise it with your sharpening provider before ordering a replacement.
Poor Alignment and Machine Calibration: When Geometry Goes Wrong
Misalignment and poor calibration cause uneven machine knife wear that shows up as one-sided dulling, chipping, or a blade that cuts clean on one end and tears on the other. The edge itself may be perfect. The machine around it isn't.
Watch for these alignment problems:
- Blade not square to the bed or anvil
- Excessive clearance between mating cutting surfaces
- Worn bushings or guides letting the blade shift under load
- Uneven clamping pressure across a guillotine or shear bed
- Feed guides out of parallel, forcing the blade to cut at an angle
Signs of Dull Industrial Knives: What to Look For Before Damage Sets In
The earliest signs of dull industrial knives show up in cut quality and machine behavior long before the edge visibly fails. Catching them early is the difference between a routine sharpening and a replacement.
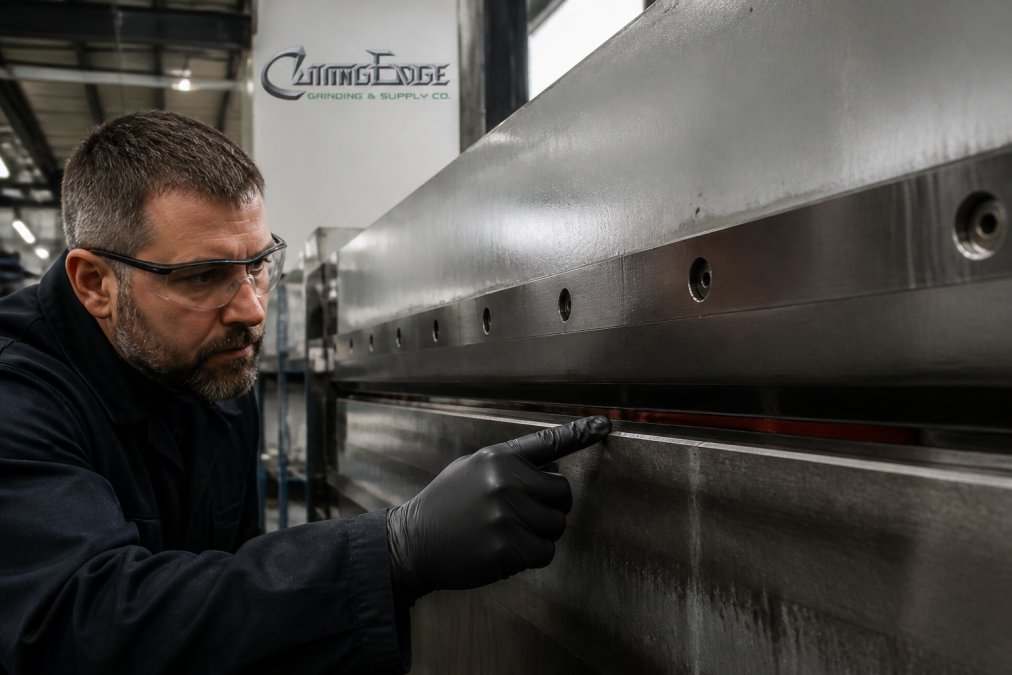
Look for these indicators during routine checks:
- Increased cutting force: the machine works harder to make the same cut
- Ragged or torn edges on the finished product instead of clean shears
- Visible nicks or chipping along the cutting edge under good light
- Burr formation on the back side of the cut
- Discoloration or heat marks near the edge, a sign of thermal degradation
- Rising noise or vibration during the cut cycle
Identifying the wear mode under magnification
A 10x to 30x loupe or a low-power shop microscope is enough to separate the three wear modes behind most blade failures. Each leaves a distinct signature pointing to a different root cause.
| Wear mode | What it looks like under magnification | What it means |
|---|---|---|
| Abrasive wear | Even, polished flank wear; the edge rounds uniformly along its length; fine scratches parallel to the cutting direction | Hard particles in the material are grinding the edge away. Look at blade grade, coating, and material fillers. |
| Adhesive wear | Material smeared or welded onto the edge; built-up edge; small tears where stuck material pulled away | The blade is rubbing rather than shearing. Look at cutting pressure, clearance, and lubrication. |
| Chipping / micro-fracture | Jagged edge; small craters or flakes missing from the bevel; cracks running back from the edge | Impact or thermal cycling is exceeding the edge's toughness. Look at feed pressure, speed, material handling, and heat. |
Reading the pattern, not just the symptom
Where the wear appears matters as much as what it looks like.
- Even wear across the full edge: abrasive material load, or a blade grade that is too soft for the stock
- Wear concentrated at one end or one side: misalignment, uneven clamping, or a feed guide out of parallel
- Wear concentrated at the tip or a single point: impact from a hard inclusion, a staple, or a jam
- Wear with heat discoloration: speed too high, cooling or lubrication failing, or both
Does a Dull Blade Increase Granulator Energy Consumption?
Yes. A dull blade increases granulator energy consumption because the machine must apply more force to shear the same material, and that extra force shows up directly on the ammeter. As granulator and shredder blades dull, the motor draws more current to maintain rotor speed against the increased resistance. Operators often notice this before cut quality, making a rising amp reading one of the most reliable early indicators of blade wear.
The knock-on effects compound:
- Higher energy draw per ton processed
- More heat in the cutting chamber
- Greater load on the rotor bearings and drive train
- Increased risk of jamming and unplanned machine downtime
Industrial Blade Maintenance Best Practices to Extend Tool Life
Industrial blade maintenance best practices center on three habits: correct handling, scheduled sharpening, and proper storage. None require new equipment.
Troubleshooting Checklist for Machine Knife Wear
Use this checklist to match a symptom to its likely cause and fix.
| Symptom | Likely Cause | Corrective Action |
|---|---|---|
| Even dulling across the edge | Abrasive material load | Review blade grade, consider coating |
| One-sided or uneven wear | Misalignment or calibration | Check clearance, squareness, clamping |
| Chipping along the edge | Excessive pressure or impact | Reduce feed pressure, inspect material |
| Heat marks near the edge | Speed too high, poor cooling | Lower surface speed, check lubrication |
| Rising granulator amps | Blade dullness | Inspect and sharpen blades |
| Burr on the back of the cut | Insufficient cutting pressure | Adjust pressure and clearance |
Frequently Asked Questions
How long does a machine knife usually last?
Tool life varies widely by material and operating conditions. In plastics granulators, blades may need sharpening every 400 to 800 hours, while paper guillotine knives can run 1,000 to 2,000 hours between services. Metal shearing blades often last 2,000 to 5,000 hours. The biggest factors are material abrasiveness, cutting pressure, and maintenance consistency. Keeping a log of sharpening intervals helps you spot wear trends early.
Does a dull blade increase granulator energy consumption?
Yes. A dull blade increases granulator energy consumption because it forces the motor to work harder to shear material instead of slicing cleanly. The increased friction and cutting pressure raise amperage draw, and can lead to overheating, thermal degradation of the plastic, and more frequent machine downtime. Sharpening or replacing blades restores efficient cutting and lowers energy costs.
What are the primary signs of dull industrial knives?
Look for increased cutting pressure, uneven cuts, burr formation, and visible edge rounding or chipping. Operators often notice more noise, vibration, or material feed problems. In granulators, a dull blade may cause higher energy draw and inconsistent particle size. Inspecting blades under magnification can reveal micro-fractures before they become major failures. Addressing these signs early prevents damage to the cutting surface and other machine components.
How often should industrial machine knives be inspected for wear?
Inspect blades at least weekly, or after every 100 to 200 operating hours, depending on material abrasiveness. High-wear applications like glass-filled plastics or abrasive composites may require daily checks. Use a magnifying loupe or microscope to spot micro-fractures, chipping, and adhesive wear. Record findings in a maintenance log to track wear patterns and adjust sharpening frequency. Regular inspection is a core part of industrial blade maintenance best practices.